Prep Time: 10 minutes
Cook Time: 1 hour
Total Time: 1 hour, 10 minutes

Ingredients
  • 2 20 ounce cans cherry pie filling
  • 1 18.5 ounce box Devil's Food Cake Mix, unprepared
  • 3/4 cup butter, melted


Instructions
  1. Preheat oven to 350°F
  2. Dump cherry pie filling into a 13x9 inch cake pan. Spread evenly out in pan.
  3. Top cherry pie filling with unprepared cake mix. Make sure it is evenly spread out.
  4. Drizzle melted butter over the top.
  5. Bake for 1 hour.
  6. Serve topped with vanilla ice cream or whipped cream.
Notes

If you still have dry patches of cake mix once your cake has baked for an hour, simply stir those parts into the cake, place back into the oven for 5 minutes.

A decadent dessert loaded with Chocolate. Add in some Guinness and you’re set for St. Patty’s Day. Also known as Death by Chocolate, simply use coffee or Kahlua instead of Guinness.
Author:
Recipe type: Dessert
Serves: 8 – 10

Ingredients
  • 1 (19.8 oz) Fudge Brownie Mix, family size box.
  • ¼ – ½ cup Guinness, Kahlua (Coffee Liqueur) or strong brewed sweetened Coffee
  • 2 (3.9 oz) boxes Jello Chocolate Mousse (or @ 4 cups of your favorite Chocolate Mousse)
  • 1 (16 oz) Whipped Topping, (such as Cool Whip)
  • 6 (1.4 oz) Chocolate covered English Toffee bars, (such as Heath bars)
  • 1 cup toasted Pecans, chopped (optional)


Instructions
  1. Bake Brownies according to directions. Cool.
  2. Using a fork, punch holes in cooled Brownies.
  3. Pour Guinness, Kahlua or sweetened Coffee over Brownies, allow to soak in and set aside.
  4. Prepare Chocolate Mousse and set aside.
  5. Crush the Chocolate Toffee bars. (Can leave in wrapper or put in plastic ziploc bag, cover with kitchen towel and smash with hammer or heavy tenderizer).
  6. Crumble Chocolate Brownies.
To Assemble:
  1. You can either use in a single trifle or individual parfaits glasses.
  2. (For a single Trifle dish) Start by layering with half the crumbled Brownies, top with half the Mousse, followed by half the Candy Bars and toasted Pecans (optional) and topped off with half the Whipped Topping.
  3. Repeat layer again for a total of 2 layers ending with the Whipped Topping and Sprinkled Candy Bars and Nuts (optional).
For Making Individual Servings:
  1. Follow above assembly directions, Dividing ingredients between 6 – 8 dishes, but only making 1 layer for each dish.
Notes
Best if made the day before. Keep refrigerated.
by mmskitchenbites

Kofta Chilly Fry...There were some leftover koftas in the freezer – half were eaten up in a curry and I didn't want to do a curry again for the balance...asked around and AW suggested  Kofta Chilly Fry "make the koftas, then in a pan, add rai, when it pops, lots of chopped garlic, lots of chopped green chilies and kadhi patta. Add some fried coconut bits if you like them. Then add the koftas back, toss and serve immediately. Oh yes, add lots of chopped dhania patta in the end". I skipped the coconut bits (not too fond of it)...OMG…they were awesome…he would probably not approve of my baking the koftas instead of deep frying , so shhhhh!!

Kofta Chilly Fry/ Meatballs Chilly Fry

Ingredients:

For the Koftas/Meatballs:
  •     Minced Meat (of your choice), 250 gm
  •     Onions, Grated, 1 medium
  •     Egg,1
  •     Salt, to taste
  •     Coriander powder, 1 tsp
  •     Red Chili powder, 1 tsp
  •     Ginger Paste, 1 tsp
  •     Garlic paste, 1 tsp
  •     Bread Crumbs, 2 heaped tbsp
  •     Oil

For the Masala Fry:
  •     Mustard seeds, ½ tsp
  •     Curry leaves, 7-8
  •     Garlic, diagonally chopped, 8-10 cloves
  •     Fresh chilies, diagonally cut, 5-6
  •     Fresh Coriander, chopped, a handful
  •     Oil, 2 tbsp


Instructions:

For the koftas:
  1. Mix all the ingredients listed under the koftas except the oil.
  2. Oil your hands lightly and form the meatballs.
  3. Place the meatballs on baking tray lined with foil. Bake in a preheated oven for 30-40 minutes at 180 °C  or until browned. (makes about 12 small koftas)
For the Masala Fry:
  1. Heat oil in a pan, add in the mustard seeds.
  2. Once they pop, add in the garlic and fry it till it turns light golden brown.
  3. Now add in the curry leaves and fresh chilies. Fry for a bit – If you think, this amount of green chilies will be too hot for you, remove the seeds from them but try not to reduce the amount of the chilies.
  4. Add the meatballs to the pan and toss  around for 5-6 minutes.
  5. Add in the fresh coriander, mix and Done!

Paleo Pizza, Gluten-Free, Nut-Free, Dairy-Free, EASY and Deliciousby paleomazing

Cook/Baker:

I know this recipe has a loaded title. It is the best darn pizza I have had in years and I have had a real yearning for a real LOADED totally paleo pizza. I mean, with the works. I love protein so this was going to be extremely creative. I wanted one that was gluten free with no dairy at all, and I was getting tired of nut flours in so many recipes I was working on lately. Oh, and a major must was I wanted intense and varied flavors in each and every bite. This was my challenge.

Ingredients

  • CRUST
  • 1 head cauliflower
  • 1 tsp dried oregano
  • 1 tsp garlic powder
  • ½- 1tsp salt
  • 1 Grade A large egg ( room temp)
  • Healthy fat ( butter, lard, etc)
  • THIS PIZZA TOPPING:
  • My sauce was hot and ready on the stove.
  • I either make my own form fresh tomatoes, some paste a tad of honey and spices or buy a jar that is Paleo friendly and loaded with healthy ingredients
  • I precut and premade:
  • Hormone-free pepperoni
  • Hormone-free Canadian bacon ( sautéed)
  • Homemade chicken sausage
  • Prosciutto (fried lightly in a pan)
  • Black olives- cut
  • Oregano- dried


Instructions

  1. Preheat oven at 350
  2. Grease a large cookie sheet or large pyrex dish with butter.
  3. Place parchment paper on top of greased up pan.
  4. Now grease the top of your paper- it will be a greasy top.
  5. Clean your cauliflower.
  6. Drain and make sure it is not wet.
  7. Shred by hand in your grater or pulse it in your food processor- I did both ways to test both ways out.
  8. If you pulse in your food processor you wants very small pieces throughout and consistent, size of rice.
  9. You want 4 full cups of cauliflower for this recipe.
  10. OPTION:
  11. Boil some water with a steamer basket and steam your cauliflower “rice” high above the water about 4-5 minutes until done- not mushy though. Strain and let cool and press out any addtl. liquid.
  12. OR- place in a pyrex ( no water added!) and microwave for 30-1minute. Depends on your microwave.
  13. Let cool, strain out any extra liquid if any. There is much less with the microwave technique.
  14. Mix your cauliflower with the egg, and spices and salt.
  15. Place 1-2 heaping balls of your mixture on your parchment paper- depends on if you want 1 or 2 pizzas.
  16. Press out by hand and mold your pizza around ¼ “ thick.
  17. Make a slight “lip” around the edge to hold your filling in if you’d like.
  18. Bake approximately 35-45 minutes.
  19. When done flip over another 3-5 minutes to form the crust even more since there is no “dairy” holding this firmly together.
  20. I found the discrepancy on baking time really depends on your oven and how wet your cauliflower is when you mix it.
  21. Remove from oven.
  22. Place on a race to allow ventilation and some air on all sides.
  23. Add your sauce and toppings.
  24. Placed the sauce on the pizza and spread it out fairly thin. This would be up to you but I do not like tons of sauce.
  25. Added as much protein and toppings as you would like.
  26. Place back in oven about 4-6 minutes.
  27. Take out of oven and serve as is or serve individual slices.
  28. Enjoy! ^_^
by  burpappetit

Type: Asian Recipes
Serves 4

Ingredients:
  • 15 large banana prawns, deveined and leave shells on
  •  10 fresh curry leaves
  • 1 packet of cereal prawn mix (available at Asian Grocer)
  • 1 egg yolk
  • 3 red bullet chillies, sliced thinly
  • 50g unsalted butter
  • Vegetable oil


Method: 

1. In a wok, heat up oil for deep-frying the prawns.  Once you dropped a bread crumb and it starts to sizzle, gently drop the prawns into the oil with curry leaves.  Deep fry the prawns until it’s about 80% cooked and the curry leaves crisp up.

2. Drain the prawns together with curry leaves and set aside.  Pour away most of the oil and leave just about 1 tbsp oil in the wok because it’s been flavoured with the prawn.

3. Melt the butter in the same wok.  Once the butter is melted, put in the egg yolk and stir into the butter quickly with your wok spatula.  When the egg yolk starts to solidify, quickly add in the cereal prawn mix, sliced chillies and the crisply fried curry leaves.  Mix well thoroughly and stir fry until fragrant.

4. Add the prawns back into the cereal mixture and stir fry to coat the prawns evenly.  Once the prawns are cooked through and mixed well, dish them up into a plate.  Serve with steamed jasmine rice.
by poetinthepantry
  • Type: Pizza
  • Prep timeCook time
  • Total time
Ingredients
  • 2 10-ounce pre-made pizza crusts
  • 1 24-ounce package Simply Potatoes Garlic Mashed Potatoes
  • 8 ounces shredded mozzarella cheese
  • 6 Tablespoons canned white corn, rinsed and drained
  • 4 slices thick-cut bacon, cooked and chopped


Instructions
  1. Preheat oven to 450 degrees Fahrenheit.
  2. Spread the garlic mashed potatoes over the 2 pre-made pizza crusts.
  3. Sprinkle the mozzarella cheese over the potatoes.
  4. Sprinkle the corn over that. Top with the chopped bacon.
  5. Bake directly on the rack for 10-12 minutes, or until cheese is melted and potatoes are hot.
  6. Serve immediately.
by Béa
Type: pastry
Servings: 6

Ingredients:
  • Pie pastry of your choice*
  • 2 pounds Macoun apples
  • 1/4 cup water
  • 1 vanilla bean, split open and seeds scraped out
  • 2 tablespoons dark Muscovado sugar
  • 1 tablespoon butter + more for dish
  • 2 Pink lady apples, peeled, cored and sliced
  • Pinch of blond cane sugar
  • 1 egg yolk, beaten with a little milk

  • *I don’t have a detailed recipe because I prepared the pastry quickly at night the day before, and didn’t measure quantities properly. Let me make it again and I will update once done.


Directions:
  1. Prepare the pastry and divide into two balls.
  2. Flatten them into two 5-inch disks. Place them between plastic film sheets and refrigerate overnight.
  3. Peel the apples, core them, and quarter them. Place them in a pot with 1/4 cup water, the vanilla bean and seeds. Simmer, covered, until soft.
  4. Let cool and discard the vanilla bean.
  5. Mash the apples with a fork.
  6. Stir in 2 tablespoons dark muscovado sugar; set aside.
  7. Preheat the oven to 350 F.
  8. Take the pastry out of the fridge. Once not too cold, roll two 10-inch disks. Place one in the fridge. Garnish a 9-inch buttered pie dish with the other. Make small holes with a fork and reserve in the fridge.
  9. In a frying pan, melt 1 tablespoon butter. Add the sliced apples with a pinch of blond cane sugar and cook for 3 minutes.
  10. Place the cooked apples on top of the pastry inside the pie dish.
  11. Add the apple sauce.
  12. Tuck in the charm.
  13. Add the other disk of pastry, and pinch the sides to close the pie (remove any excess of pastry).
  14. Beat the egg yolk/milk mixture with a dash of sugar and brush on top of the pie. Using a fork, make a pattern on the pie.
  15. Bake the galette for 40 minutes, or until the top is light golden brown.
  16. Remove from the oven and let cool. I love this galette eaten lukewarm.
Type: Breads
Servings: 2 loaves 
Prep Time: Cook Time: 3-4 hours

Ingredients:

  • 4 cups bread flour 
  • 2 teaspoon active quick rising dry yeast 
  • 2 teaspoon salt
  • 1/2 cups warm water

Directions:

1. Put 1/4 cup of bread flour on your clean counter top and reserve. Place remaining 3 3/4 cups bread flour in your mixer bowl. Spoon the yeast on one side of the bowl, and the salt on the other side. Pour in the warm water and with your regular mixer paddle, mix on low speed until the dough comes together in a mass. Switch to the dough hook. Mix on medium speed for 2 minutes. Dough should clear the sides but stick to the bottom. If it is too sticky, add 1 tablespoon of flour at a time. If too dry, add 1 tablespoon of water to dough to adjust.

Let the dough rest for 5 minutes.
The dough should look like this during the rest:
French Bread
 
2. Turn the mixer on again and mix for 3 minutes. Take the dough out and place on the counter. Remember that 1/4 cup of flour that we reserved? We’ll use it now. As you knead the dough by hand, incorporate more flour as you need.

Knead by hand until the dough is very satiny, smooth, tight and formed into a nice, compact ball:
French Bread Dough Ball
Place this dough in a large lightly oiled bowl (I use Pam spray). Turn dough over so that all sides have a thin coating of oil. Cover with plastic wrap and set in warm place for 1 1/2 hours to let rest and rise. Dough should almost double in size. While the dough is rising, about 1 hour into the rising stage, preheat your oven to 450F and place your pizza stone, inverted baking sheet or covered cast iron pot into the oven to heat up.

4. After the dough has risen fully, punch dough down and form back into a ball. Poke your finger on the surface – the dough should give into the pressure and slowly creep back up.

5. Ok, here’s the fun part. Cut the dough into half – you’ll shape one half at a time (keep the other piece under wraps) Pick up the dough – stretch it out until it forms a big rectangle. Dust your work surface with flour and fold over the ends of the dough like this:
French Bread
Now do a little “karate chop” lengthwise down the middle of the bread and stretch out the long ends again. Fold over in half. The karate chop helps get the middle tucked inside. Pinch all sides shut. This is important – you want to make sure that all ends including the short ends are pinched tightly to create a seal. This allows the bread to rise & expand up and out evenly. If the bread looks a little lopsided, you can try to fix it by letting it rest 5 minutes and gently stretching it out again. Just don’t knead the dough again – you’ll pop all the beautiful gas that took 1.5 hours to create!

Here’s what it should look like:

French Bread


6. Turn the bread over so that it is seam side down. Cover the loaf with a damp kitchen towel. Repeat with the other dough ball. Leave the loaves to rest on your well-floured pizza peel or cutting board for 30 minutes. After resting, take a sharp paring knife and make 3-4 shallow, diagonal slashes on the surface of the loaf. This allows the steam in the bread to escape so that it expands evenly during the baking process:
French Bread

7. When you are ready to bake, remove your baking vessel from oven. Carefully slide the gorgeous loaf into or onto your baking vessel. I like baking one loaf at a time. The most important equipment to have is an instant read thermometer to measure temperature of the bread.

If you are using pizza stone or inverted baking sheet: You can probably fit both loaves on it at the same time if you wish. -> Get a 1/2 cup of water ready next to the stove. Open the stove, put your bread in the oven and throw the water on the oven floor. Immediately close the oven door. This creates your steam. -> Bake 20-25 minutes. Check temperature of the bread – internal should be 190-210F. Remove and let cool before cutting into it.

If you are using a long cast-iron pot or covered baker: -> Before closing the lid on your pot/baker, put 1/4 cup of water directly in the pot. Cover immediately. Put pot in oven. -> Bake 10 minutes. Remove lid of pot. Bake another 14 minutes. Check temperature of the bread – internal should be 190-210F. Remove and let cool before cutting into it. Repeat with other loaf. (For convection ovens- bake 8 min covered, 10-12 min uncovered. Check temperature of bread) To re-crisp the crust, put in 375F oven for 5 minutes. Eat one loaf, share the other loaf with a friend!
French Bread


Type : Asian Recipes
Servings: 6  
Prep Time: 15 minutes Cook Time: 2 hours
Adapted from Nom Nom Paleo Cookbook by Henry Fong and Michelle Tam. This recipe makes a Vietnamese Pho Soup concentrate.
A tip for the Beef Eye of Round. The key to this is to very thinly slice. These slices will be added to each person's bowl RAW. When you pour the simmering hot pho broth into each bowl, it will cook the beef perfectly! To slice very thin, space the Eye of Round roast into the freezer for 20 minutes. This will firm up the roast and make it easier to slice very thin.
OR - sometimes you can find already-sliced beef at your grocery store. My store sells pre-sliced beef that you use for cheesesteak sandwiches. Even if it's not eye-of-round roast, just use what they are selling pre-sliced!

Ingredients:

  • 3 whole star anise
  • 2 tablespoons whole coriander seeds
  • 1 cinnamon stick
  • 3 whole cloves
  • 1 green cardamom pod
  • 2 tablespoons butter, divided (Non-Paleo version: cooking oil)
  • 8 slices fresh ginger, unpeeled, 1/2 inch thick
  • 1/2 large yellow onion, peeled
  • 2 pound beef cross shanks, 1-1/2 inches thick
  • 1-1/2 pound oxtails
  • 1-1/2 pound beef brisket
  • 3-1/2 tablespoons fish sauce
  • 1 pound beef eye of round roast, very thinly sliced (keep refrigerated until ready to serve)
  • 8 cups shirotaki noodles (Non-Paleo version: dried rice noodles)FOR THE TABLE:2 limes, cut into wedges
  • 2 jalapeño peppers, sliced
  • 1 bunch fresh cilantro
  • 1 bunch fresh Thai basil (or regular Italian basil)
  • 1 bunch fresh mint
  • 2 cups bean sprouts
  • Sriracha sauce (store bought or 20 Minute Sriracha Recipe)


Directions:

1. In a large saucepan over medium-high heat, add all spices and toast until they become fragrant. Take care not to burn them! Place them in a coffee filter or piece of cheesecloth and tie it up. Place the sachet into the pressure cooker pot.

2. In the same sauce pan over medium-high heat, add 1 tablespoon butter (or oil) and add onion and ginger pieces. Brown until there is a nice sear on them. Remove them from the pan and place them in the pressure cooker.

3. Sear the meat in batches: add the remaining tablespoon of butter to the pan and sear the shank, oxtail and brisket. You'll do this in batches, all in a single layer. Give everything plenty of space so that they SEAR and brown. Crowding the pan will not brown the meat. Sear each side, remove each meat from the pan and add them to the pressure cooker.

4. Cover the contents of the pressure cooker with water or up to the fill line. Set your pressure cooker to cook for 60 minutes. This means it will cook under pressure for 60 minutes. It will take time to build up pressure (usually 30 minutes) and additional time to release pressure after cooking (usually 30 minutes).
Approximately: 30 minutes to build up pressure + 60 minutes under pressure + 30 minutes to release pressure. Exact timing is really not that important - and also depends on your pressure cooker system. Follow manufacturer instructions.

5. Once finished cooking and safe to open, open the pressure cooker and using a fine mesh or ladle, remove the top layer of fatty liquid that has accumulated on the surface of the broth and discard (there will be lots of it.) Remove the onion, ginger and spice sachet and discard. Remove the meat to your cutting board. Shred the brisket using two forks. Remove any other meat from bone.

6. The resulting broth is a concentrate. Dilute the pho concentrate with 4-6 cups of water. Season the Pho broth with fish sauce. Taste and add additional fish sauce if needed. Bring to a simmer on stovetop right before you are ready to serve.

Assemble the Pho Bowls:
Serve to order. In a large bowl for each person, add shirotaki noodles and meat (including the sliced eye of round). Pour the just-simmering hot broth into each bowl. Hot broth will cook the sliced eye of round. Serve with the remaining sides a la carte so each person can add whatever they'd like to their soup.


Vietnamese Pho Pressure Cooker (Noodle Soup) Recipe Video

)


By SteamyKitchen


  • Type :  Panini Recipe
  • Servings: 4 
  • Prep Time: 10 minutes Cook Time: 5 minutes
For a gluten-free version, use gluten-free bread. The fresh mozzarella in the recipe is optional, I love the sandwich with or without it. Here's a tip - if you are not using fresh mozzarella, be generous in seasoning with salt and pepper to give the tofu some extra flavor.

ingredients:

  • 8 slices bread (I like good crusty Italian bread)
  • 2 tablespoons olive oil
  • 8 thin slices prosciutto
  • 4 ounces silken tofu (firm) thinly sliced (I used Mori-nu brand)
  • 2 medium tomatoes, sliced
  • 4 ounces fresh buffalo mozzarella, sliced
  • 8 leaves fresh basil
  • salt and pepper
  • 4 teaspoons balsamic vinegar


directions:


  • Heat panini press to medium-high heat. Brush one side of the bread with olive oil. For each sandwich, layer on the prosciutto, tofu, tomatoes, fresh buffalo mozzarella and basil. Generously season each sandwich with salt and pepper. Drizzle 1 teaspoon of balsamic vinegar on each sandwich. Close the sandwich, and brush the outside of both bread slices with olive oil. Place sandwich in panini press. Cook for 4 minutes or until the panini is browned.
  • Alternatively, you can grill these sandwiches in a grill or frying pan over medium-high heat until golden brown on both sides and heated through. Serve warm.
By SteamyKitchen

Type : Asian Recipes
Servings: 4 
Prep Time: 10 minutes Cook Time: 8 minutes

Ingredients:

  • 1 pound dry rice noodles (about 1/4" wide)
  • 1 tablespoon cooking oil, divided
  • 1 pound raw shrimp, peeled and deveined
  • 1 egg, beaten
  • 2 cloves garlic, finely minced
  • 1/4 pound snow peas, sliced diagonally lengthwise
  • 8 ounces bean sprouts
  • one 8-ounce jar prepared Pad Thai sauce
  • 1 tablespoon water
  • optional toppings: Sriracha hot chili sauce, torn fresh cilantro, lime wedges, chopped peanuts


Directions:

1. In a large bowl, fully submerge the dry rice noodles in hot tap water (not boiling, just hot to touch). Let them soak for 8-10 minutes. Drain and set aside.

2. In a wok or large saute pan over high heat, add just half of the cooking oil. When the oil is hot, swirl it around the bottom of the pan and add the shrimp in a single layer. Let cook for 2 minutes. Try not to move the shrimp too much, let them develop a sear and then flip to sear the other side for an additional minute. The shrimp should be half-cooked. Remove the half-cooked shrimp to a bowl and set aside.

3. Keep the pan on the stove and add the beaten egg to the pan, stirring constantly to fry quickly. Remove cooked egg to the same bowl as the shrimp.

4. Turn the heat down to medium-low and let the pan cool down a bit. Swirl in the remaining cooking oil. Add the garlic to the pan and stir fry until the garlic becomes fragrant, about 30 seconds. Add the snow peas and bean sprouts and stir fry for another minute. Add the sauce to the pan from the jar. To get every bit of sauce from the jar, add a tablespoon or so of water, close lid, shake jar and pour that into the pan. Add the drained noodles into the pan. Turn the heat back up to medium-high. Stir to combine.

5. The moment the sauce begins to simmer, add the shrimp and egg back into the pan and stir fry everything until the shrimp are fully cooked through, about another minute. Add optional garnishes and serve immediately.
 By administrator

  • Type : American Recipes
  • Servings: Yields 24 cupcakes 
  • Prep Time: 20 minutes Cook Time: 30 minutes
  • Make Ahead: Undecorated cupcakes, if tightly wrapped, can be kept in the freezer for two-three months.

Ingredients:

  • 1 box Devil’s Food cake mix + ingredients needed to make the cake according to package instructions
  • 1 cup strong coffee, cooled
  • 1 pound (two 8-ounce packages) cream cheese at room temperature
  • 3/4 pound (3 sticks) unsalted butter at room temperature
  • 1 teaspoon vanilla extract
  • 1 teaspoon coconut extract
  • 1 1/2 pounds powdered sugar, sifted
  • ¾ cup shredded coconut


Directions:

1- Before mixing cake batter, replace one cup of the water called for in the cake mix instructions with the coffee.

2- Mix the cake batter according to package instructions. Pour batter into a cupcake pan and bake as directed; allow to cool.

3- Toast the coconut in the oven. Preheat the oven to 350 degrees F. Spread the coconut onto a baking sheet, bake in the oven for 2 minutes, check and toss the coconut then bake another 2 minutes or until all the coconut is slightly toasted.

4- To make the frosting, use a stand or hand mixer to cream together the cream cheese, butter, vanilla and coconut extracts. For this, medium-low speed is best; beat for about 2 minutes.

5- Slowly add the powdered sugar while the mixer is on low and mix until smooth.

6- Frost the cupcakes and sprinkle with the toasted coconut.

Prime Rib Roast with Miso Jus RecipeBy SteamyKitchen

Type : American Recipes
Servings: 6-10 
Prep Time: 10 minutes Cook Time: 20 minutes per pound

Ingredients:

  • 1 (6-10 pound) standing rib roast
  • salt and freshly ground black pepper
  • 1/3 cup miso paste (or 1/2 cup Miso & Easy), divided
  • 5 large carrots, halved
  • 8 stalks celery, halved
  • 2 onions, halved
  • 1 cup red wine
  • 2 cups good quality beef stock


Directions:

1- Heat the oven to 250F. Season the rib roast on all sides with salt and pepper. Rub just 2-3 tablespoons of the miso (keep the rest of the miso for the Au Jus) on all sides of the rib roast. Place rib roast in a large roasting pan. Scatter the vegetables all around the roast.

2- Roast for 17-20 minutes PER POUND or until temperature of the middle of the roast is 130F (medium-rare to medium). Turn the broiler to high and let the roast brown a bit on the outside, for about 5 minutes. Transfer roast to cutting board, carefully untie the bones from roast. Cover loosely with tin foil. Rest for 20 minutes.

3- While roast is resting, make the Miso Jus. Keep the vegetables in the roasting pan but discard all but 1 teaspoon of the fat. Place the roasting pan 2 burners set on high heat.

4- Pour in the red wine and cook until wine is reduced by half. Use a wooden spoon to scrape up the bits. Whisk in the beef broth and 2 tablespoons of miso paste (or 3 tablespoons Miso & Easy). Turn heat to medium-low and simmer for 15 minutes. Add any juices accumulated from the rib roast on the cutting board. Turn off heat.

5- Strain the jus with mesh strainer, pressing down with wooden spoon to extract out all the juice from the vegetables. Carve the roast, serve with the jus.

  • Type : Burgers
  • Servings: 6 (makes 6 burgers)  
  • Prep Time: 5 minutes Cook Time: 10 minutes
 This recipe is also great for using leftover rice, brown rice wild rice, couscous, farro or quinoa. You can substitute up to 1/2 cup of bread crumbs with any of these items. So, if you have 1/2 cup leftover rice, you can use that + 1/2 cup panko bread crumbs. In the video and photos, I used 1/2 cup quinoa + 1/2 cup panko bread crumbs. You can make Black Bean and Tofu Sliders instead - just make 12 small patties and use slider buns.

Ingredients:

  • 1/4 red onion
  • 1 bell pepper, cored
  • 6 ounces fresh mushroom of your choice
  • One 16-ounce can black beans, rinsed and drained
  • 2 teaspoons garam masala seasoning
  • 1/2 teaspoon kosher or sea salt
  • 6 ounces soft silken tofu (I prefer Mori-nu brand)
  • 1 cup panko bread crumbs
  • 2 teaspoons cooking oil
  • 12 burger buns
  • mayonnaise (or soy mayonnaise)
  • 2 cups fresh arugula
  • 6 ounces goat cheese (or soy cheese)


Directions:
1- Roughly chop the onion and bell pepper (it makes it easier for the food processor). In a food processor, add the first 6 ingredients. Pulse until the mixture becomes finely minced.
2- Drain the tofu and pat dry. With a large spoon, mix the tofu and the panko bread crumbs into the patty mixture. You can taste the mixture and add additional garam masala seasoning or salt, if needed.

3- Refrigerate the patty mixture for at least 20 minutes (or up to overnight). The mixture should be moist, but just firm enough to hold a patty shape - if it is too wet, mix in 1/4 additional bread crumbs. Shape the mixture into 6-8 patties.

4- When ready to cook, heat a frying pan over medium heat and swirl in the cooking oil. When hot, carefully add as many patties that can fit without touching. Fry each side until it is golden brown, about 2-3 minutes per side. Assemble the patties onto each bun with mayonnaise, arugula and cheese.

  • Type: breakfast
  • Prep Time: 10 minutes Cook Time: 25 minutes  
  • Number of persons: 4 People
Recipe adapted from Hazan Family Favorites by Giuliano Hazan. Adding just a pinch of sugar to the onions will speed up the caramelization. After the frittata is cooked, let it cool before cutting into it -- it's easier to cut nice, clean slices when the frittata has had a chance to cool. I like to serve frittata warm (not hot).

ingredients
  • 1 onion, sliced
  • 3 tablespoons butter
  • 1/8 teaspoon sugar
  • 12 ounces zucchini (1 large zucchini or 3 small zucchini)
  • salt and freshly ground black pepper
  • 5 eggs
  • sprig of fresh thyme (or 1/4 teaspoon dried thyme)
  • 1 tomato
  • 4 ounces goat cheese


 preparation

1. Heat a nonstick pan over medium heat and add the butter. When the butter starts bubbling, add the onion. Sprinkle in the sugar. Saute the onion until carmalized, about 8-10 minutes. Take care not to burn the onions.
2. While the onion is sauteeing, slice the zucchini very thinly (1/8" thick) using sharp chef's knife or a mandolin. Cut the tomato into 1/4" slices. When the onion is ready, add the zucchini and season with salt and pepper. Cook, stirring occassionally until zucchini is tender and has just started to brown.
3. In a large bowl, beat the eggs with the thyme; Preheat the broiler and set the rack to about 8-10 inches below the heating element.
4. Once the zucchini is cooked, pour in the eggs. Top with sliced tomatoes and dot with crumbles of goat cheese. Cook for 6 minutes.
5. Place pan under broiler for 2-3 minutes until the top is lightly browned. Let cool for 10 minutes before slicing. Serve warm or at room temperature.

watch video 


)
  • Cooking time: 30 Minute (s)
  • Total time: 10 min  preparation 15 mins cooking
  • average calorie
  • cheap
  • Number of persons: 4 Persons
Ingredients
  • 4 eggs
  • 200 g frozen spinach cream
  • 30 g of butter
  • 20 g flour
  • 20 g Parmesan
  • salt and pepper


Preparatory steps
1 Preheat oven to 200 ° C.
2 Thaw spinach in microwave.
3 Meanwhile, form the crumble topping by mixing fingertips 20 g of butter, flour and parmesan.
4 Butter 4 ramekins baking with the remaining butter and pour spinach.
5 Break the egg on top, salt and pepper.
6 Crumble crumble on top and place the ramekins in a baking dish filled with boiling water.
7 Bake about 10 minutes, depending on desired doneness.

advice

Serve with fingers of buttered bread, topped with a morsel of ham.

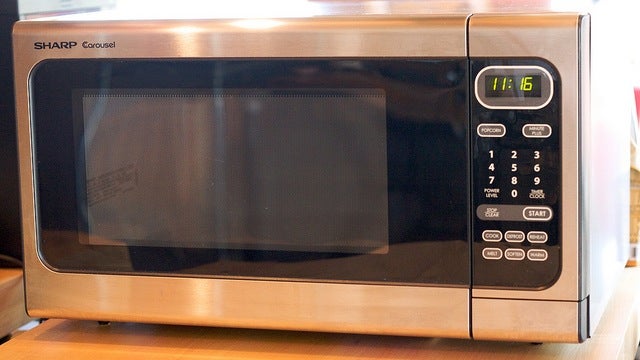
When you buy a microwave oven you expect it to provide many years of dependable service. Modern microwaves are well-made and most are built to last. However, there are things you can do to keep your oven in good condition and prolong its usefulness. These seven tips will help you get the most from your microwave and avoid many headaches.

1. Read the instructions. Learning all about your oven will keep you from making mistakes that shorten its lifespan. These papers may contain valuable information. For instance, you can find out how to cook, defrost, and use all of the other functions. In fact, you may discover functions that you didn't know you had.
2. Keep it clean. A dirty oven makes for unhealthy cooking and can cause people in the household to become ill. Also, when bits of food become lodged in turn table rollers, it can result in premature wear. Dirty appliances corrode much quicker than clean ones and you could be buying a new oven before you know it. The best way to keep your oven clean is to cover everything before cooking or heating. This will keep you from spending your weekends scraping cheese from the inside walls and ceilings.

3. Utilize child lockout functions. Raising kids is one of life's great pleasures, but also one of life's biggest challenges. Nothing shortens the life of a good microwave like scientific experiments. Kids have been known to place aluminum foil inside of microwave ovens, just to see what happens.This can cause serious damage and may result in a fire hazard. There is only way to insure that children do not use the appliance unsupervised, and that is to lock them out.

4. Maintain the door latch. When you clean the oven make sure to clean off the latch too. If not, it will soon get sticky and the door may not operate properly. In time, this will cause excessive wear on your door latch. Keep it clean and if it sticks, apply a tiny amount of cooking oil.

5. Consider surge protection. If you live in an area with frequent lightning, you should invest in surge protection for your appliances. Whole house protection is best and will more than pay for itself with one major power surge. Many power companies have special offers and programs for home electrical surge protection, and they will provide you with a free inspection. If you cannot afford a whole house system, buy surge protection strips and be certain that you use one with the proper rating for your oven.

6. Know when to say goodbye. At some point your old oven will see its better day. Instead of hanging on and making life inconvenient for you and the family, buy a new microwave oven. Today's ovens are not overly expensive and come with more power and features than ever before. Also, consider buying a two year extended warranty. They do not cost much and if you have a major problem in the first two years, you can return the appliance for a new one. Not everyone advises buying extended warranties but they provide something very important, peace of mind.

7. Microwave ovens must be disposed of properly. Never place them inside of trash barrels to be picked up. They contain radioactive materials and are considered hazardous waste. Contact your local refuse company and find out how you can properly dispose of your old oven.
Article Source: http://EzineArticles.com/?expert=Alice_Folsom
  • Preparation time: 25minutes > Cooking time: 25minutes > Ready in 50minutes
  • number of persons: 4
ingredients

  •     Spaghetti 500 g
  •     250 g of bacon slices
  •     20 g of butter
  •     3 large eggs
  •     15 cl of cream
  •     Salt and freshly ground black pepper
  •     Grated Parmesan for decoration


Method of preparation

  1.     Bring a large pot of lightly salted water to a boil. Cook the spaghetti uncovered for 12 minutes. They should remain slightly firm , al dente
  2.     Meanwhile, grill smoke chest. When it is crispy , drain it on paper towels and cut into small pieces.
  3.     Beat the eggs with the cream , a pinch of salt and pepper. In a saucepan , warm the chest in the butter over low heat .
  4.     Put the spaghetti in a colander, rinse under hot water and drain very long . Pour into the pan. When they are heated , add egg mixture , cream , mix the time it cooks slightly and serve immediately with Parmesan cheese.
  5.     Note:
  6.     The bacon is crispy past the grill and low in fat , but you can also chop and fry over low heat in the butter before adding it to spaghetti. Milk can replace the cream, but the sauce will be less smooth.
  7.     Use preferably freshly grated Parmesan . If you buy it in a bag , it often tends to be dry and less tasty. This cheese , lump, will keep for months in the refrigerator , wrapped in a sheet of parchment paper and then in another foil .