How to Bake Great Bread at Home
Many people are extremely intimidated by bread making. I’ve heard
folks say everything from “I’m afraid of yeast,” to “I can’t make
bread.” And that last is usually before they even try their hand at it.
With the proliferation of helpful tools–everything wonderful bread
cookbooks to stand mixers to electric bread makers to baking stones–one
would think that bread baking has become more accessible. The basic
ingredient list is very simple and easy to find. Of the four main
ingredients, water, flour, salt and yeast, I’m willing to bet that
everyone has at least three of them in their kitchen or pantry right
now.
Maybe what’s needed here is not gadgets, but knowledge. An
understanding of how the ingredients work together along with some tips
on technique will hopefully help you become more confident and
successful with your bread baking.
#1.
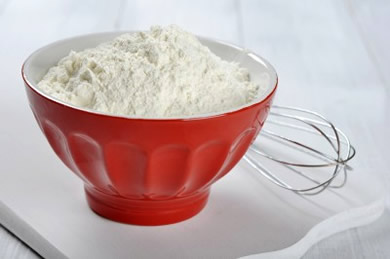
Buy a Scale.
A successful bread dough is all about the ratio of flour to water.
You will get more consistent and reliable results if your measurements
are accurate.
If your bread recipe is written in cups, do the conversions. Measure
flour in a cup and then weigh it. Write down the weight. Do this three
times, and then take the average of the three weights. If your three
cups weigh 4.3, 4.5 and 4.4 oz each, the average weight is 4.4. Now you
can use that weight to do your conversions. If the recipe calls for 7
cups of flour, you know you will weigh out 30.8 oz.
#2.
Proof Your Yeast
When you proof yeast, all you’re doing is proving that it is alive.
That it is eating sugar and emitting bubbles of carbon dioxide, because
that is what yeast does. If you are starting with brand new yeast well
within its use-by date, it is not strictly necessary to proof every time
you bake, especially if you make bread frequently. But, if you found
some yeast shoved into the back of your cabinet or you haven’t baked
bread in months, it is best to err on the side of caution and prove to
yourself that the yeast is alive.
If you are using a bread recipe that calls for putting all your
ingredients, including the yeast, in the mixer together and turning it
on, warm up a portion of the water called for in the recipe. Yeast will
die in temperatures of over 140°F anyway, which defeats the purpose of
proofing your yeast in the first place. Don’t stress over the
temperature too much. As long as it feels warm and comfortable to you,
it will be warm and comfortable for the yeast. Add a tiny pinch of
sugar, squirt of honey or splash of maple syrup, just enough to give the
yeast a reason to wake up and eat.
Stir everything together and wait 10-15 minutes. If the mixture is
nice and foamy with a dense head on top (kind of like the head on a
freshly pulled pint of Guinness stout) you’re good to go. If you don’t
see any bubbles, let alone foam, the yeast is dead and you’ll need to
buy more.
#3.
Limit the Flour in Your Dough.
One of the real sticking points for many people is the range of flour
amounts that many recipes call for. Most of us like clear instructions,
and telling us that a certain bread requires between 7-8 cups of flour
is just not precise enough for us.
Maybe this will help. Most sandwich
bread does best when the ratio of flour to water is 2:1. So, for every
4.4 oz bread flour, you’ll need 2.2 oz water by weight. One half the
weight of the flour is the amount of water you’ll need. Know that, even
if you think the dough seems too sticky, if your ratio is correct, your
bread will be just fine. Resist adding extra flour. While adding more
flour does make dough less sticky, it invariably leads to a dense loaf
that does not rise as much as it should.
#4
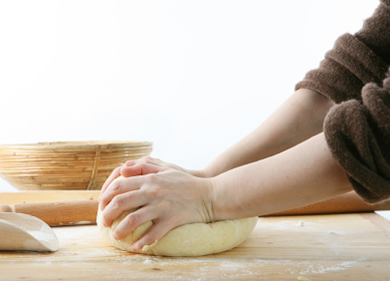
. Don’t Use Flour When Kneading.
I cannot tell you how many bread recipes call for turning the dough
out on a floured surface. But we have already established that it’s not a
good idea to add extra flour. The solution is fairly simple. Spray a
light mist of olive oil or pan spray on your counter and on your hands.
You can also use a touch of melted butter. Now you can shape the dough
without it sticking so you won’t be tempted to add any extra flour.
Even if your dough doesn’t call for any fat, a small amount of oil on
the counter will not adversely affect the dough. As a matter of fact
that tiny amount of added fat will probably help to keep the bread from
staling too quickly after baking. If you really don’t like the idea of
adding oil, a light spritz of water will do the same thing.
Use a bench scraper to scrape any dough that might stick to your
counter. I have found that using a bench scraper (bench knife) also
helps to keep me from reaching for additional flour.
#5
. The Windowpane Test

The purpose of kneading is to develop gluten. Gluten is a protein
that is formed when two other proteins, glutenin and gliadin, combine
with water and then get agitated–stirred, mixed or kneaded.
(Incidentally, that’s why when you make some baked goods, you mix
minimally and gently once you add liquid to the flour. You don’t want
much gluten to form at all in the case of cakes, pancakes and muffins).
But how do you know when enough gluten has formed to let your bread
rise nice and high and to get a lovely chew? It’s called the windowpane
test. After kneading for several minutes, tear off a small piece of
dough (if it stretches a lot before pulling away, that is another good
indicator of good gluten formation).
Roll the dough into a small ball and then flatten it into a disc. Now
start rotating and stretching the dough, as if you are making a tiny
pizza. You should be able to get the dough thin enough that it is gets
nice and translucent before tearing. If the dough tears before
stretching out nice and thin, you know you have some more kneading to
do.
This test works best on white breads as the sharp edges of bran in
whole wheat and other whole grains tend to cut some of the gluten
strands. That’s why whole grain breads tend not to rise as high as white
breads. You should still be able to stretch the dough into a
windowpane, but you won’t be able to get the dough as thin.
#6
. A warm fast rise or a long cool rise?
A bread dough that rises in a warm place rises more quickly than a
bread dough that rises in a cool place. A faster rise will allow you to
enjoy your bread that much sooner, but you’ll get better flavor from a
longer, slow rise. Most bread recipes call for two rises. The first in a
bowl and the second after shaping. If you have the time to refrigerate
your dough overnight after shaping, go ahead and do that. The next
morning, pull the dough out, let it come to room temperature and finish
its rise before baking.
Knowing how to manipulate rising time can help you if you suddenly
get called away in the middle of your bread baking day. As long as it is
well covered, refrigerating the dough at any point before baking is
perfectly acceptable. And it is much preferred over just leaving the
dough out on the counter to overproof.
#7.
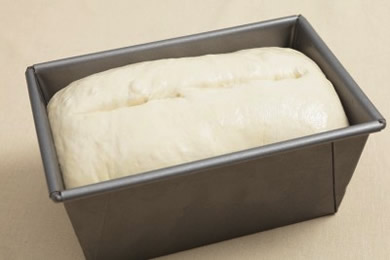
Slashing/Washing/Finishing.
Slashing the dough before baking does more than just make a pretty
pattern on your bread. It also helps direct how the bread will rise in
the oven. Have you ever baked a loaf of bread and ended up with a large
air pocket right under the crust? Well, slashing your loaf helps prevent
this.
For a sandwich loaf, one long slash down the center of the loaf is a
nice finishing touch. If you are baking a round loaf, a “Tic Tac Toe
board” slash will let your bread rise evenly all the way around. For
long, slender loaves like baguettes, a series of angled parallel slashes
down the length of the dough gives you a classic baguette-look.
Prior to slashing, you can brush the dough with egg wash, water, milk
or egg white. Now is the time to add some poppy seeds, sesame seeds or
whatever topping you would like. You can also leave the bread plain.
#8
. Store Fresh Bread in the Freezer.
Unless I know that we will be eating all the bread I have made in one
day, I let it cool to room temperature and then freeze it. With
sandwich loaves, I go ahead and pre-slice. That way, when I want to make
a sandwich or some toast, I can pull out only the bread that I need. Go
ahead and make your sandwich on frozen bread. It will surely be thawed
and soft by the time you’re ready to eat, especially if you’re sending
it in child’s lunchbox.
You can also toast the bread straight from frozen. Either way, eating
bread in a sandwich or as toast, the bread will taste as fresh as the
day you made it for up to three weeks.
To freeze fresh bread, make sure it is completely cooled first. Then,
slice (or not) and put in freezer bags. Press out all the air that you
can and seal. I sometimes even use a straw to suck out even more air,
like a person-powered Food Saver. I would not use a Food Saver machine
to freeze bread as the amount of vacuum created can smash the bread.


